Sunday, October 09, 2016

Two steps forward and one step back

Gauge - the most common advice given by knitters to other knitters is to check gauge. When something doesn't fit as it should - knitters mention gauge, and discuss if the swatch was big enough, if it was washed, blocked or maybe even not washed or kept. A swatch is meant to save knitters a lot of bother. Mostly it is good advice but sometimes gauge swatches lie. Gauge swatches are by nature smaller than the garments they are knit for, and can't predict how the weight of a garment will pull and distort the swatch.

Last time I posted I was well on the way to finishing my saddle shouldered cardigan. This post - the cardigan has been frogged, the maths reworked and the cardigan has begun again with fewer stitches. I had both sleeves worked and was 10 centimeters into the body below the underarm when I decided to steam block the work to open up the cable. The steam blocking relaxed the knitting and when I tried on the cardigan the sleeves hung mid knuckle, and more worrying the shoulder slumped off my shoulders and the armhole hung low - unflatteringly low.

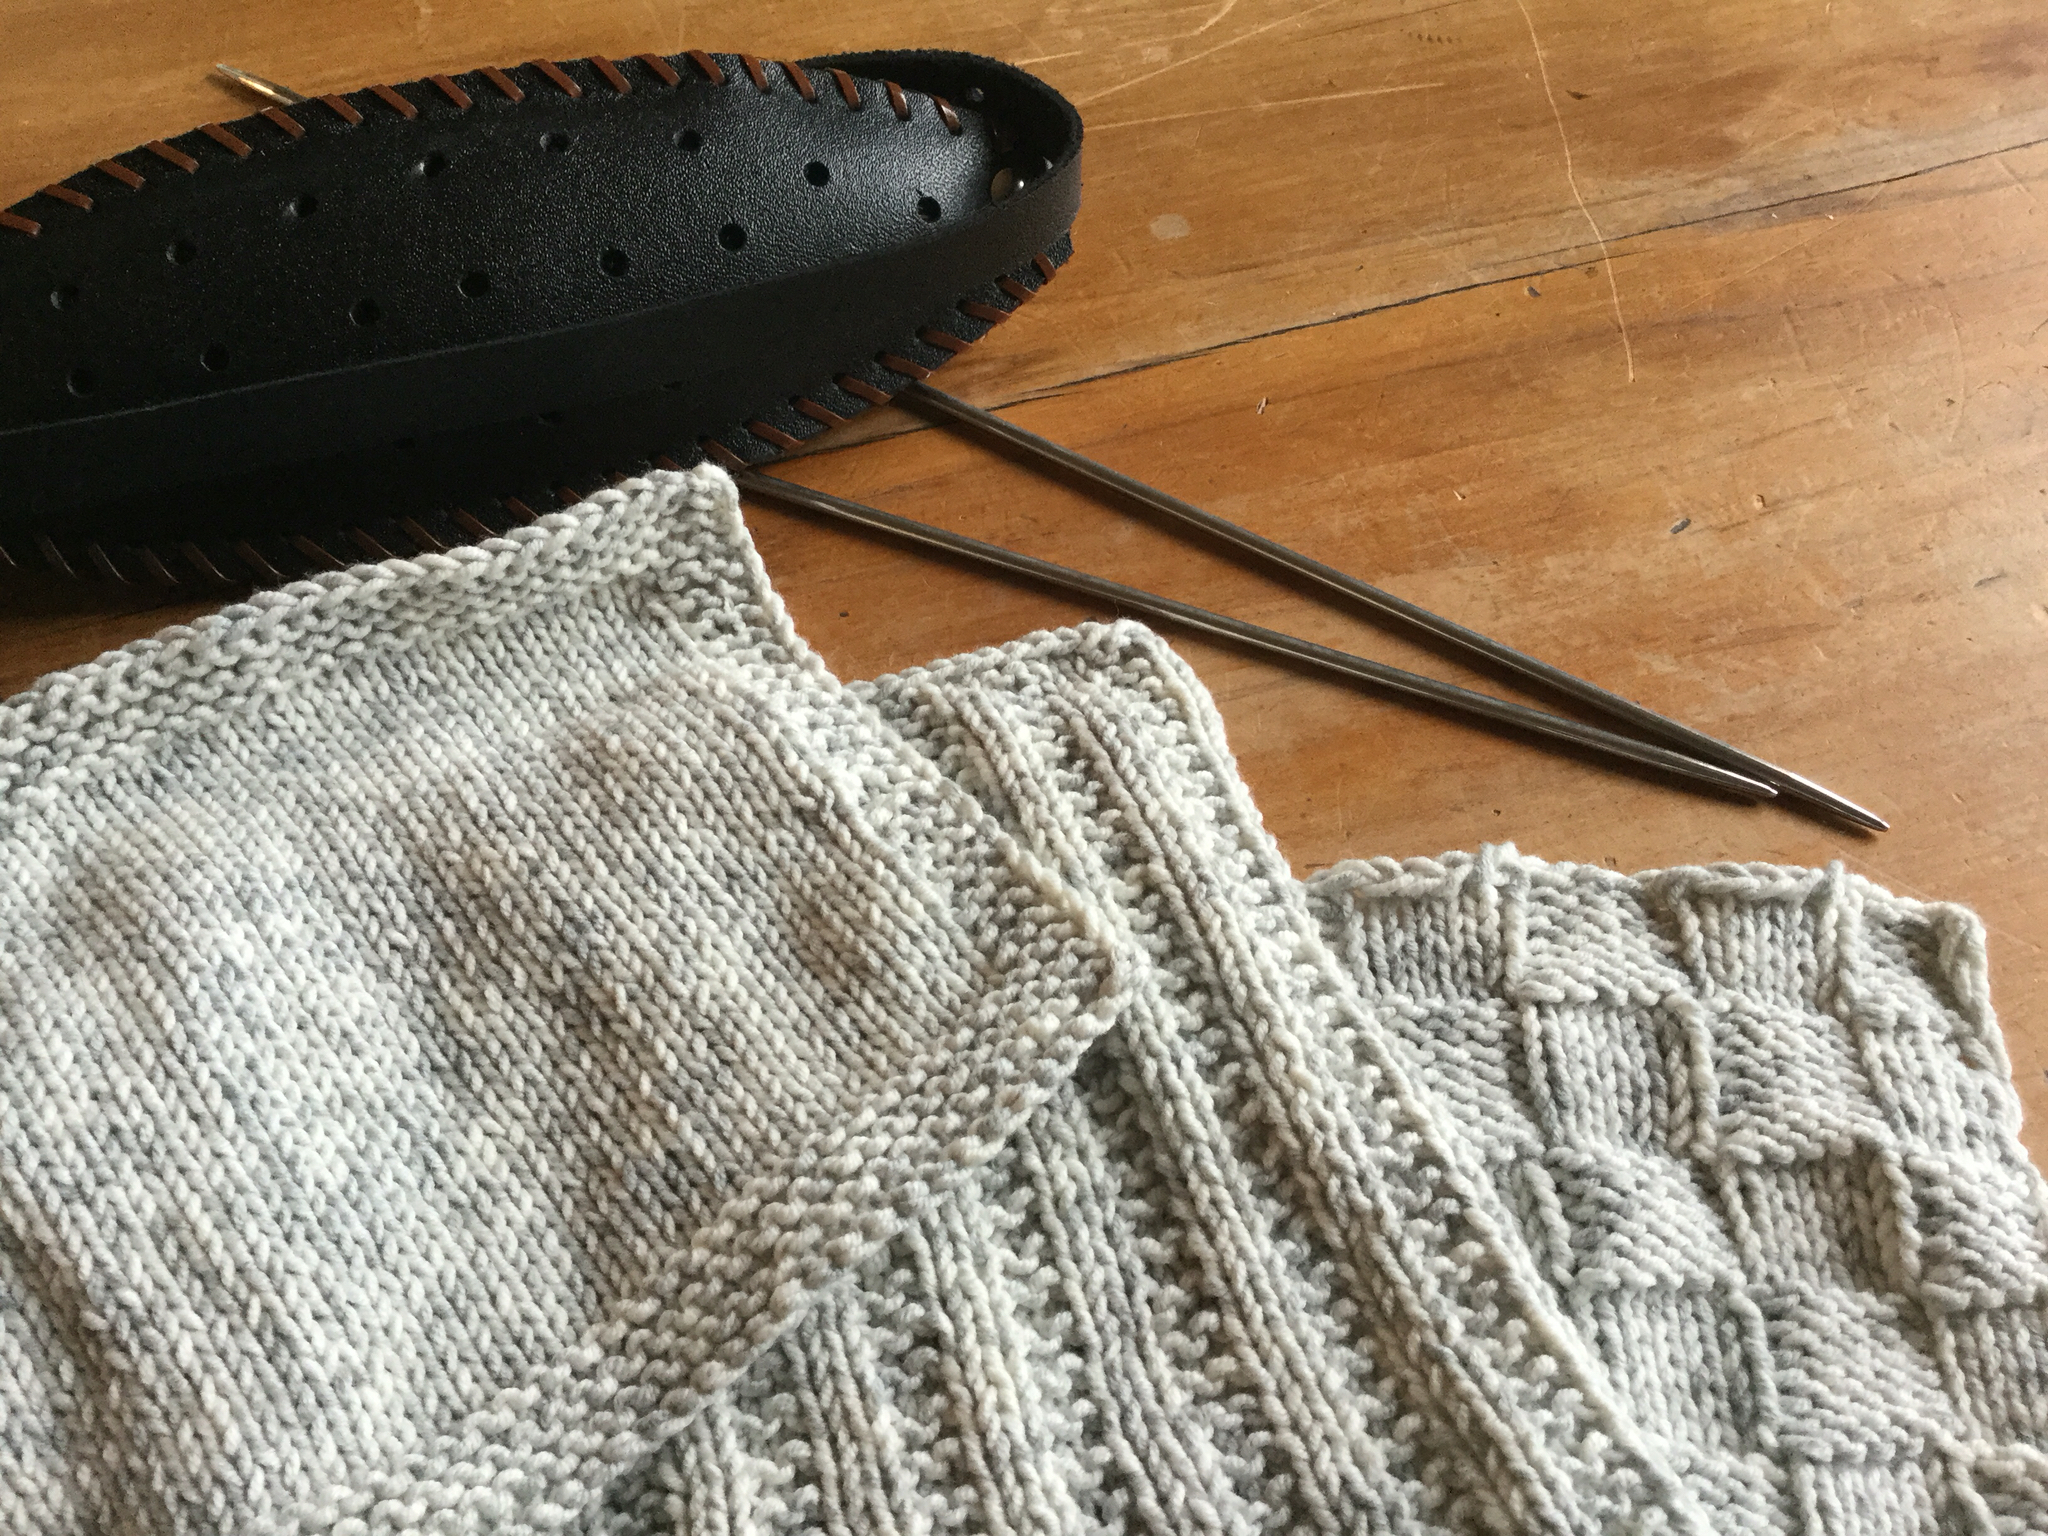
So Thursday, at knit night I wrapped the cardigan around my chest - and found that it overlapped by 5 cm. That was a problem as I had calculated it to be an exact fit with 5cm for button bands. By overlapping 5cm the bust was 10cm or 4 inches too big. So I frogged, I pulled out the needle and wound back the yarn into balls. Annoyingly I had woven in the ends - but luckily the silky wool ends pulled out easily. Then Friday I sat down and did some calculations, and measured a cardigan that fits well to determine the across back measurment for a hand knit - this time I did the math for a bust 10 cm smaller than mine - seems I am working on negative ease here, it can stretch over the bumpy bits and fit without stretching over the smaller bits.

This time I planned my shoulder increases a little bit better, so the increases align better with the armsye line. The first time around I didn't think the placement of the increases through. With fewer stitches progress seems to be faster. I'm nearly up to the underarm, just working a few increases to help the sleeve and body curve into place better.


The other knitting this week was Hearts for Humanities - Otago University, like many educational institutions is suffering as the lower number of school levers results in fewer enrollements. That means less funding, fewer enrollements, and so fewer staff required. One of the faculties facing cuts is the Humanities - and while I am a science graduate i know in many places my area of study falls within the humanities divisions. I understand the economics - and the reality, but I don't like it, protesting might not change anything but it does make the decisions more visible.

So ... the Thursday night knit group meets weekly on university grounds, and was approached to knit red hearts that would be used to highlight the funding cuts. Most of the knitters have some connection with the university, as staff or alumni, and several were happy to help. Here are my 6 hearts, knit in Four Seasons, 8ply, 100% Acrylic. Acrylic to withstand the weather outside where they will be used. The tassels were my way to use up all the Acrylic, the pattern is Heart wash cloth revised, by Tricotine on Ravelry.com. I made several minor modifications as I knit, improving each one slightly, eventually slipping the last stitch and knitting the first to give a neat chain edge, and working the triple increase as a K, yo, k into the center stitch. I shifted the increases and decreases one stitch into the body, It's a neat pattern and only 40 rows. This was one of the few heart patterns that didn't require knitting each 'lobe' separately - for quick things like this I dislike cutting and joining and weaving in more than the beginning and ending ends.

Na Stella.


Friday, September 30, 2016

Look a blog post!

Hello, yes it has been a while, but today there is an update. I've been knitting, and doing other things. But this place is about the knitting. So today, there are three washcloths, knit with a Shetland belt, my colourwork project stalls (but I think I know why) and a developing design for a cardigan.

First the washcloths, three, knit in a blend of cotton and something man made, I didn't actively buy this - being a bit of a fibre snob about things synthetic, but it was a swap shop score. Sadly I've found that wash cloths with some synthetic fibre might actually be easier to use than pure cotton. They hold less water, so feel nicer, not all clammy and cold when picked up.

The wash clothes were a two-for project, knit to continue my practice with the the knitting belt and because some of our wash clothes have developed holes. An unnamed child used them to clean a craft knife of plastic scrapings and sliced the yarns in places, words have been said and replacements were required. I still have the colour work scarf ... As knitting belt practice, but felt the need for some plain practice. Plain as in one yarn, because a mix of knits and purls is not strictly speaking plain. First one is my standard go to checkerboard cloth - thin, flat and supple. Second is a garter rib - for knit purl practice and third is stocking stitch with a garter edge. Needles were 4mm stainless and 35-36cm long, which I think is a tad long for me. There seems to be a few more offerings for needles online - than when I first looked, I have some shorter, 30cm ones coming from POK, which should feel easier to use than the longer ones I have now.

The colour work scarf project langishes - I think becasue the longer needles are just a bit to much of a stretch for my arms - but it has grown since last I posted about it. And I'm happy with the way the colours are working out, at first the darker brown was very murky against the blue background, but the pink is much clearer. I can see why the default is a white background - but that seemed to predictable. I think I am on my second of five repeats - and might have to buy more yarn ... We shall see.


Finally there is a cardigan on the needles, this time circulars so knit in my usual way. This is a top down saddle shouldered cardigan, with a cable running down the saddle and sleeve into the cuff. I'm knitting the sleeves first while I think about the body. I know I want hip length, and I like the ribbing at the backwaist of Slanted Sleeven - so I am thinking of using the cables to do the the same kind of shaping. For now I am near the end of the second sleeve.


I am rather liking the way the shoulders have worked, it is a saddle as I mentioned but with some increases along the armsye/body line. I was inspired by EZ's saddle shaping but hers is bottom up not top down. I've also tweaked the underarm shaping to better mimic the curves found in flat patternmaking - it just helps the sleeve and body better wrap around the complex curves there. Or at least I think so.

The yarn is half silk half wool - and project notes as always on Ravelry.

Na Stella


Friday, July 29, 2016

Still knitting

But for some reason not blogging, but today - an update. There has been progress on many knitted things, a secret swap shawl (gifted already), a cardigan (done but not photographed on the body), and a sweater remade (again worn but no photo evidence). These things I will endevor to photograph and post sometime soon. But in the spirit of keeping it current - today it is about the 'on the needles' stuff.

This is my Fifty-Me cowl, knit in an indulgent cashmere-camel-silk-and baby alpaca blend. (Road to China silken Jewels). I know merino is soft, and silk is soft but this is S O F T - so soft it takes my breath away every time I squish it. The project feels like a total indulgence, comparatively to other things I've knit the yarn is not cheap, but I turned 50 earlier this month and it is my present to myself. Pattern modifications are few - a tubular cast on and faced hem, turmeric colour way to replace the lime shock in the original. Pattern is the three color cashmere cowl by Joji Locatelli. I've seen a few in real life - and recently one was gifted at the local mid-winter swap, which just tipped the scales and inspired me to do one myself.

The other current project makes use of rainbow or EQ Kauni, some how I acquired two 160gram balls (in separate shopping incidents) of this with no clue of what to use it for. My only thought at the time was ohhh what wonderful colours. Anyway - the balls are too tall to fit into my yarn storage drawers easily and the ball bands were getting ripped and torn. The simple solution was to find a way to use them and prevent further storage issues.

The answer was Mon Petit gilet rayƩ by Isabelle Milleret. Only issue was the Original gauge is 22stiches in 4", my gauge is 23, and I didn't want to go looser or more open, so I've adjusted the stitch count and plunged in. I used a simple adjustment, divided the pattern stitch counts by 22(original gauge) and added the result to the stitch count - effectively adding the right amount of extra stitches to accommodate a 23 stitch gauge. My swatch was generous - and slightly worrying was all Orange stripes on my dark green background. Two colours I wouldn't have picked - but I trusted the yarn and by one third of the way down the yoke the colour run shifted to deep blood red, then into purple, then blue, then lilac. Like most colour work it is slightly addictive seeing the pattern emerge - I've now split the yoke into sleeves and body and had to decide what I was going to do with the colour shifts across the body and sleeves. Some knitters work the body and then knit the sleeves letting the colours fall where they fall - other manipulate the colour shifts so the sleeves match the body. You can see some of the 800 variations posted on Ravelry.com here. I took inspiration from Marikorose's variation posted on Ravelry, she had a photo showing the mini-balls she split off to keep the sleeve stripes consistent with the body.

I calculated the that I needed enough yarn to knit 140 stiches for each sleeve stripe - to make the sleeves match I need enough for two sleeve stripes. I marked out 140 stiches, and put a slip knot in my working yarn at a distance of 1m from the needles, and knit, when that meter was used, I marked a second meter, and then a third. I calculated I needed 2.25m of yarn to work one sleeve stripe of two rounds and weave in ends. Double that for both sleeves and I need to set aside 4.5 meters of yarn for each body stripe. I measured of 4.25m of lime green yarn, my measure-stick, and I've cut the working yarn and set aside my first sleeve stripe. This method means many ends to weave in - I plan to weave in as a knit where possible - but will keep the sleeves and body matching. Many of the variations finish the stripes at the waist or elbow - and I am leaning that way. I suspect it will get messy when I get to the sleeves - and there are questions around two at a time or one first then the other - but I have a body to work first.

Kauni is not a soft yarn but the colour shifts are amazing - the dark green solid Kauni I've used as the background felt like a brave choice - but I want to step away from the predictable gray and cream. I have played safe and bought enough off white plain Kauni to knit a second one in - remember I have two balls of 160g of the EQ rainbow. Pattern modifications other than gauge were tubular neck edge to replace ribbing, I just like the polished look.

It's getting dark now, and evening food needs thinking about if not cooking, curtains need drawing and both knitting projects call me.

Na Stella


Saturday, April 16, 2016

And so it begins

There is a Saturday knitting group, meets every five weeks or so and each session focuses on a technique or detail. We meet yesterday and the focus was flowers - but I was distracted. Alongside the five-weekly topics there is a year long project - this year is is a colour work challenge. The goal is to explore some aspect of colour work and develop a better understanding. Lorna, group inspiration and leader is working with a knitting belt and traditonal fair isle patterns and her own hand dyed yarn. Others a working tams or colour work tubular scarves and exploring different combinations of colours. Me - I am planning to become more proficient with a knitting belt and the 2+1 arrangement of long dpns.

Once I decided what I was going t work on I ordered some shorter needed, Etsy provided these three sizes in stainless steel, from BobNWeave, there are lots more sizes on offer but these work with the fingering yarns I like best for colourwork. EBay provided a cheap and cheerful all round set of 11 sizes from 1.5mm to 5mm, also in stainless steel.

So with needles sorted and no excuses with the camp sweater all done and off at camp - I began.

The first challenge for a left handed yarn handler like me, one who works with both yarns in the left hand was to fathom out how best to tension the yarns with a belt supporting the right needle. I decided the best thing was to knit a swatch.

I picked some yarn similar in weight to my pectoral yarns and began. At first I tried to carry both yarns in the right hand - and that produced interesting results, that is to say the tension of the foreground and background yarns was very very different. Long ago, before I converted to knitting with two yarns held in the left hand I had briefly tried to knit with a colour in each hand - and found it almost impossible to remember which colour went with which hand movement. The coordinated amongst you will laugh, probably out loud, but even when I could see the orange yarn was in eb left hand - my brain seemed to take an age to work out that it was the left hand, that one there that I had to move. So with the knitting belt I avoided working with a yarn in each hand - until nothing else worked and then eventually after consultation with knitting friends and Ravelry group who all asked 'if I had tried a yarn in each hand' I thought insipid revisit the technique.

I'm glad i did, and glad that others kept recommending I try - as this time, many years after my initial tries my eyes, hands, brain all seem to be better at working together. You might notice that the practice swatch begins with ropey tension and ends with much more even tension between the two yarn colours,

And so I begun my knitting belt project, a tubular cowl, designed by Wendy Johnson, the Leftovers Cowl in the real yarns (not that the other yarns were imaginary -- just they were not the ones selected for the project). So far so good, I'm eager to knit up all the brown and work the patterns in the various shades of pink. The pink yarn is Schopel Wolle Zauberball 100, in Villa Rosa, a single, and the blue is from the same manufacturer but applied yarn named Admiral in a lovely soft deep blue. The orange chain is my provisional cast on - all easy to be unzipped when the cowl is done and the two ends ready to be grafted together for a seamless join.

The project and details are listed on my Ravelry page, here, the Makkin Cowl. Makkin is, I am told, the Shetland name for a knitting belt, and also the practice of knitting with a belt.

Na Stella.


Sunday, April 03, 2016

Top down cardigan and buttons,

A few decades ago I bought a knitting book, the kind that is a kind of dictionary, with instructions for lots of different knit textures explained. It was one of the Mon Tricot serries, they seemed to have published dozens of similar titles. This one listed several hundred stitch variations and on the very last page illustrated the process for knitting a top down, saddle shouldered seamless sweater. I was intrigued, amazed and baffled by how one could do that. All my knitting up to then had been flat, knitting sections of a garment and then seaming them into something 3D. Since then I discovered the Internet, dpns, circular needles, and many many resources for knitting seamless 3D garments. But I've never lost that sense of wonder at the ability to construct a seamless knitted garment. I've lost count of how many seamless garments I've knit, but I know how many seamed garments I've knit, none.

I love the entire concept of seamless construction, and top down even more. I love I can see the garment take shape as it is knit. I love I can try it on and adjust the shape or length as I work. I love I don't have to wait until I have knit each piece and then seam them together before I can evaluate the fit and style.

And mostly I love I can finish the garment as I knit, I can weave in ends and then when I work the final stitch I weave in that single end and it is done! With cardigans, especially ones with buttons there is also sewing on the buttons. This time I've added a new ''finishing' order to knitting a cardigan. I am knitting Slanted Sleven, where the buttonholes are worked into a band that is formed as the cardigan is worked, this time I decided to stitch on the buttons as I worked rather than after I finished.

I choose dark shell buttons, and the back of them is darker - so I planned to sew them 'wrong side up'.


I used a heavy top stitching thread to sew the buttons on, and a blunt wool needle. I matched the buttons to the button holes and worked from the top of the center front down - keeping the top down theme. Instead of using a new and separate thread for each button I snaked it through the knit stitches on the back of the band to reach the next button position. I worked a few half hitch knots to secure the thread after each button before working on to the next location.


The thread was a good match - and just disappeared into the knitting. I've added two buttons to the markers for the next so button holes, and I've left a length of sewing thread to stitch the buttons on as I work the holes.

Which means I have only to knit until this is hip length and then add sleeves. And that last stitch will mean, cutting the yarn, weaving in the end and blocking.

I do appreciate the advantages of top down knitwear construction.

Na Stella


Friday, March 25, 2016

Progress and stuff

Hello, I am still here, working on the winter camp sweater, it has one sleeve, and half another sleeve to the mid point. Usually I knit the body till it is done and then return to knit the sleeves - but given this is being knit from a limited amount of yarn - I want to finish the sleeves and then knit the body until it is long enough or until the yarn runs out.

This is where I am so far, the size is classic Elizabeth Zimmerman eps (Elizabeth's percentage system). Usually that means the sleeves are always quite generous at the bicep - so I began the narrowing mid bicep, every sixth round until it was the right length for the arm and then added the cuff.

Other preparations for camp continue, today younger cub hauled out the 'family backpack', which dates from when her dad was in his twenties and toured UK. It is old (both parents are old Bear cross the six decade line a few years back) but useful (so is Bear) and saves us spending loads of $ on a smancy new one. Not being able to find her thermals meant younger cub had to clean her room a little, and in doing that she found another sweater that fits (just).


This is the sweater she found, it was a Gansey styled one I knit back in 2009 for her elder brother. It has his initials knit in, and has lasted well. turns out it was pushed to the back of the wardrobe as one cuff was raveling. A quick fossick around the garage yarn storage spaces turned out the cone of left over yarn. That means that sometime this week I will hook up the laddered stitches, frog back the cuff edge and reknit it, nice think about Ravelry and workbooks is that I can easily see what size needle I used.

All this camp knitting is me being very good and controlled, the year long project this year for study group is a colour work scarf, some are using multiple colours and working with colour choices, others are knitting with long dpns and a knitting belt. I am in that second category - and in preparation I ordered medium length dpns online as the ones I had were either too short or too fine for a scarf.

I ordered a set of 11 sizes from 1.5mm to 5mm in hollow stainless steel from Suppliescraft on EBay. Free delivery, stainless and all those11 sizes in a 13" length.

They come in a plastic case, which is slightly disappointing as I know the plastic will eventually go brittle. I thought from the sellers image it was a cardboard box or folder - which is what I intend to replace the case with soon. I may have to see how I can replicate the golden panda and text on the case - as it is pretty impressive. Part of me knows it probably just describes the contents - but as an outsider or other it seems strangely exotic. And while the case is a slight disappointed the needles seem excellent.

The case also came with a cute fan needle sizer and a yarn sized needle. I plumped for thisset after reading several reviews and recommendations on the knitting belt and Gansey forums on Ravelry. General theme of the comments seemed to be the needles are very good quality, the thinner ones bend after a while when used with a knitting belt, but that was to be expected with thin and or hollow needles when used with a belt. People also mentioned it was great to have a set of sizes to hand in the set.

I also ordered 14" stainless dpns from BobNWeave on Etsy, slightly longer and hopefully in the sizes I use most with fingering yarn that isn't being knit into socks. These come in interestingly labeled sizes - but only as the seller actually uses a micrometer to determine the real thickness and describes them actually. Not sure if these are hollow or solid - but th seller knits with a belt so that indicates they are sturdy enough.

The yarn for the colour work project is sitting tempting me, my dark green/blue slanted Sleeven that is mid project is also tempting me, but I am resolute - for now I am knitting the Winter Camp Cardigan and once it is done I will knit-all-the-things all the time.

Stella


Sunday, March 20, 2016

Call to action

Sometimes knitters get a call to action. Last week I was happily knitting on my dark green blue sock yarn slanted Sleeven and bam! Younger Cubs camp provision list came home -- listing two woolen sweaters or polar fleece tops were required.

Well! Turns out she has loads of hats, loads of woolen socks, and loads of mitts and gloves - but no long sleeved sweaters that fit her. Emergency stations as I dug through the stash (knew it was an essential to keep the stash stocks high) and found some good warm thick (for me) Aran weight merino mossum yarn. The colour choices were blue or brown, with some contrast of red, green and orange. Younger cub was not particularly enthusiastic about having a sweater knit - so the blue was kept for me and the brown, with green and orange highlights donated to the cause.

Sweaters knit in a hurry are simple, this one is a raglan, knit in the round, with stripes of the available yarns alternating until just brown remains to knit the lower edges. We both agree it might not be 'pretty' but it will be warm and it is knitted with lots of love. They will spend one night camping out in small pup tents - and it should have turned colder by then, warm and snug is the goal, together with finished.

The deadline is April, already the yoke is pretty much done.

I am using Techknitters jiggles stripes, the ones for three rounds or more, so far so good, my stripes started with three rounds and have increased to 6. I think they will stay at 6 - as carrying yarn further will require attention to twisting or securing the yarn floats.

On the outside the jog where the colour changes are pretty much joggless.

Nice.

Excuse me whilst I head off to knit some more.

Na stella


Saturday, March 12, 2016

Small things

This year there has been knitting, last weekend was Unwind 2016, for the first time in years I didn't teach so had time to enjoy the event as a student instead of being on high alert about my classes being organized. I attended bookbinding with Jan who had completed a proper bookbinding apprenticeship - she was good and I learned little interesting details. I took a blending fibre class - with Suzie (deepcreek on Ravelry) who shared some rather wonderful insights into how to make small amounts of lovely fibre go further, and what to do with ugly colour of fibre too good to discard.


This was my all time favorite revelation, mixing a small amount of georgous-ness with a background colour to create a yarn with subtle variation and hints of the colour in different amounts. It looks like the stirations that occur in cliffs and other geographical landscapes. Just a note - that as all Suzies work not mine.

We also looked at gradients - of course. These I have done before but not from light to dark - my previous ones have been from shade to shade.

I have to say the samples are all Suzies, my own play was with a dark green that I had dyed but didn't speak to me in a lovely way. The rolags aure perhaps prettier in real life than the photo shows ... Mixed with a natural pale grey and a hint of sparkle there might be some promise in the green.


I also went shopping, and on Friday spotted some lovely buttons. On Saturday I brought with me all the yarn that was destined to become cardigans - and sorted buttons for each future cardigan. I cheated a little, as when I had matched all the potential cardigan yarn in stash to buttons - I bought another supply of cardigan yarn. From Dark Habour, the gradient pink called Mary Tudor, and went back for mor buttons. The soft blue green is also a cheat - I had one skein but ordered several more skeins from Holland Road Yarn to make a linen cardigan - I love the idea of a soft floppy linen cardigan that will be perfect for summer days. The buttons are from Buttons by Benji - Nicola Duffy, www.gingermint.nz. I also bought some in the Chinese style willow pattern becasue I have a soft spot for blue and white and beautiful, no cardigan planned for them but I suspect that won't be a problem for long.

In the goodie bag were tiaras - rather lovely ones, all metal and sparkle gifted by the lovelies at Outlaw yarns and which were worn most of the weekend by most of the delegates - I have never seen so many lovely Divas in one place before, and almost none acted like divas. Day one I lunched with Angela and her mum on the local organic health food shop cafe, all whole meal and healthy, think shades of natural dyes, - and overheard a wistful 'I have never seen so many tiaras in the shop before' from one of the staff. Also stashed was 220 grams of 50/50 blend of organic dark merino and alpaca lace weight (another featherweight cardigan), filla di cross linen cotton blend (swap shop goodness), the Mary Rose gradient (with two more skeins ordered to make a cardigan amount), a braid of sock blend fibre to spin from Vintage Purls, more 3mm needles (almost go to size for knitting with fingering weight if not making socks).

And then this last weekend there was knitting study group - where we were steeking using the crochet method. The sample was a mini cardigan/sweater - which I finished as a vest for Kit from American Girl Doll. The steek method was ok - but won't replace my hand sewn steek which I prefer. The pattern was for long sleeves - but I didn't know if I had enough yarn left (probably did) and thought it would be cute as a vest - besides I wanted it off the needles - it was a one day project. The yarn was from Skeinz, a lovely heritage merino 8ply, that was in my goodie bag. It was so nice I might have to aquir more to knit myself something.

Also on scored by Kit is a hat, this year the ongoing knitters study group project is a tubular fair isle or colourwork scarf. Lorna leads the group and after visiting Shetland earlier in the year she is working hers on long dpns with a knitting belt - I decided to join her. My colourwork with a left hand yarn carry is good - and I don't need to improve it but it is always good to practice new or different techniques. So I dug out my kniting belt, bought in Shetland in 2011, and my long stainless steel dpns and knit Kit a hat. I didn't know it was for Kit, but she fits it so she gets it.

The hat is a little large, hasn't been blocked and is probably a little firm as too gauge. I only had 2mm and 2.5mm 40 cm long dpns to hand but have ordered a set from eBay (free shipping and stainless steel) so can soon play with th yarn I bought for the scarfs. I knit the hat with what is called 2+1, so had the stitches on two dpns and used a third, beginning and ending each row were a tad tricky but not impossible. This differs to most dpn configurations where stitches are on three or four dpns and another is sued to knit. The old school was was apparently with three - but off course people are different so that is not to say some didn't knit with three+one, or four+one. I tried three. It found that two made for a less sticky out and pointy sharp dangerous arrangement - so for now I will work with two+one,


And the scarf, the idea is we meet up every month to work on a technique and also to share progress on our scarves and maybe inspiration or charts, and at the end of the year at the Christmas lunch/last class for the year we show off our projects. I bought a lovely pair of schoppelwool yarns, Admiral in plain dusky blue and zauberball 100 in Villa Rose.

As soon as the new needles arrive I can begin to play...

Take care. Na stella


Saturday, January 23, 2016

Acquisitions

So .. Bear and went 'out of town' two days in a row. Yesterday we headed down south, through Milton, and back through Etrick, and we stopped to peruse shops which sell old things, in Milton I picked up a vintage seam allowance marker, a lovely old one with a wood handle. There is a little bit of rust - but that will be easily cleaned off.

This is a tool used by those who make patterns for clothes, it had two parallel spikey wheels, which mark out 5/8 of an inch, the standard domestic seam allowance for woven clothes. This one has a lovely curve to the shaft - which just fits how a hand with finger extended pushes to ensure the spikes leave nice clear marks.

Underneath is a book I picked up today (and under that a related book I've owned for a while - The Arts & Crafts Movement in New Zealand 1870-1940 by Ann Calhoun). Today we headed North, to Waimate to pick up fruit from my dads garden. The book, 'Light: shade, and shadow' by John Skeaping is an old school drawing course. It contains a serries of progressive excercises designed to develop a style of drawing that would produce a useful artist. One who could go on to decorate ceramics, sign write, illustrat, or even - the what was considered at the time the pinochle of Art and Design - architecture.

On top is an example drawing from Light: shade, and shadow, underneath an example of an examination drawing by a New Zealand student in 1896 ( from Ann's Book). The student, identified in the book only as Pansy was working on a qualification to become an art teacher.

Globalization is nothing new, even in 1896 - the skills required of an art student on both side of the earth were pretty similar. From what I understand art schools would purchase plaster mounds of standard drawing shapes, the cone, the column, the cube, the vase, and use these to train art students in how to draw accurately.


The same vase appears on an earlier page of Light, shade and shadow.

Bear and I have spent quite a bit of time talking about how such a universal education in drawing, universal in the west anyway, resulted in a very shared language for those working in art and design at the time. In more formal architecture, and in some commercial design (ceramics and illustration/signage) it is quite easy to see the evidence of this kind of training. Part of me is a little sad at the lessening in appreciation for this kind of training and skill set, it became old fashioned shortly after 1900 and was replaced by more individual styles of drawing.

Na Stella


Sunday, January 17, 2016

That cardigan ..

May be too large. When I began to knit it I had to work out two things. First, I didn't get gauge with the yarn I was using - so I had to pick which size to knit to get the size I wanted. Second, I am eating less and moving more in an effort not to be overweight, I had one of those glimpses in a passing shop-window-mirror and realized I was pretty much in fat-heading-towards-fifty territory. I can't change the fifty years old - that is inevitable, but I decided I could change the fat. I bought a Fitbit One back in July and used it to determine my activity level and calculate how much I should eat if I wanted to be smaller. In September I upgraded to a Fitbit Charge HR, and between the two devices and being honest with logging what I eat I've lost 16+kg's. The side effect of the not-getting gauge together with not knowing what size I actually needed means that the Slanted Sleven cardigan I have been knitting and that I am 2/3 of the way through is looking like it I'll be too big.

So the cardigan languishes, I've put it on a lifeline to free it from distortion of being on a circular needle, and tried it on. It's slightly big - and I know the superwash yarn will only grow and relax when I wash-block the work. For now I am leaving the project be as I come to terms with frogging and beginning again.

To distract myself I have begun a new project. Last year I bought myself a pair of Doc Martin boots, nothing to extreme, just dark navy 1460, I had a similar pair in my 'yoof' but let them go at some point thinking the time for such things had passed.

Anyway - the Doc's are comfortable, light and pretty much all terrain shoes, in Dunedin, home of the gothic trend Doc's even belong in posh places. When I wear them to work, Gavin calls them my 'don't mess with Stella shoes'. And best of all Doc Martins are perfect partners for hand knit socks, well almost perfect. I'm still working on the perfect length, most of my existing hand knit socks are too long and need folding over. Becasue they were not designed to be folded the exact science of where to fold them for optimal wearing ease eludes me. Too long and too much sock protrudes, to short and they sneak into the boots as I walk. That isn't a problem except typically one sock sneaks and the other remains - and the irregular perfectionist in me dislikes the one sock up one sock gone look that results. My perfectionism is weird - it objects to some things and ignores others - like spelling.

So the sock, well girly pink to go with the dark french navy blue Doc's. The yarn is Sock, Lady by Vintage Purls. The toe is a three point swirl, and I am working on a subtle eyelet pattern up each side of the instep. The eyelets are evoking the ones used for laces but there will be lots more than 8 of the boot. The custom knit to wear with a Doc feature I have planned for the leg is a two layer rib cuff, thick, cushy and just the right length to stay put when worn. I need to work out how to secure the layers at the right length, grafting, three needle bind off, transition from single to double and back to single layer and back again - so many possible options.

So far I've reworked the toe three times to get the numbers and transition to the foot sorted. I've worked the cable with two purl stitches either side and with one (shown) and I think I need to go back to two to set off the cable. The gusset and heel is next and won't be too showy but will be fitted. Then a band of ribbing before a transition to a double layer ribbed leg.

Honestly it is way more fun solving sock technical details than frogging, solving the gauge /size conundrum and reknitting a cardigan - especially as I might be smaller yet when it is done.

Na Stella